In this article we’ll walk through the process of setting up Docker for Symfony on Ubuntu, ensuring a smooth and efficient development experience.
The Pivotal Role of Docker in Modern Software Development
By leveraging containerization, Docker provides a lightweight, efficient, and standardized environment for software development. This ensures that applications run seamlessly regardless of where they are deployed. What Docker brings to the table:
- Consistency Across Environments: Docker containers offer a consistent environment for applications from development to production, eliminating the all too known “it works on my machine” situations.
- Rapid Deployment and Scaling: Docker’s containerization allows for quick deployment and scaling of applications. Containers can be spun up in seconds, making it easier to manage and scale applications dynamically.
- Resource Efficiency: Containers require less overhead than traditional virtual machines, allowing more efficient use of system resources.
- Isolation and Security: Each Docker container is isolated, running its own processes, dependencies, and filesystem. This isolation not only prevents conflicts between containers but also enhances security by limiting the scope of potential vulnerabilities.
- Simplified Configuration Management: Docker allows developers to define and manage application configurations through code. This simplifies the process of deploying applications in different environments.
The Docker Container System

Designing an effective Docker container system typically involves segmenting different aspects of your application into separate containers.
We are going to focus on containers for PHP, MySQL, Nginx, and Redis. This selection provides a comprehensive yet manageable scope for the article and can be expanded with containers for messaging (RabbitMq), SMTP (MailHog), testing and deployment (Jenkins), or anything necessary for the project at hand.
Prerequisites
First things first, we will need to install docker. Previously we could have just done sudo apt-get install docker -y and then check that it was correctly installed by running docker -v. However, that command would install docker compose v1, which was deprecated since July 2023 and has stopped receiving updates, so we’re going to install docker compose v2 instead.
To install the Docker engine:
1.Setup Docker’s apt repository
# Add Docker’s official GPG key:
– sudo apt-get update
– sudo apt-get install ca-certificates curl gnupg
– sudo install -m 0755 -d /etc/apt/keyrings
– curl -fsSL https://download.docker.com/linux/ubuntu/gpg | sudo gpg –dearmor -o /etc/apt/keyrings/docker.gpg
– sudo chmod a+r /etc/apt/keyrings/docker.gpg
# Add the repository to Apt sources:
– echo \
“deb [arch=$(dpkg –print-architecture) signed-by=/etc/apt/keyrings/docker.gpg] https://download.docker.com/linux/ubuntu \
$(. /etc/os-release && echo “$VERSION_CODENAME”) stable” | \
sudo tee /etc/apt/sources.list.d/docker.list > /dev/null
– sudo apt-get update
2. Install the Docker packages
sudo apt-get install docker-ce docker-ce-cli containerd.io docker-buildx-plugin docker-compose-plugin
3. Test installation
sudo docker run hello-world
docker compose version
Docker typically needs sudo permissions to run commands, but I hate that. We’re going to create a docker group (if it doesn’t exist already) and add ourselves to it.
sudo groupadd docker – creates group if it doesn’t exist
sudo usermod -aG docker $USER – adds the current user to that group
newgrp docker – activates the changes to the group
docker run hello-world – optional, use this to check that docker now runs without the sudo prefix
Secondly, since we’re going to use docker for local development, we should stop the local Apache server if it’s active. sudo systemctl stop apache2 will stop the service and sudo systemctl disable apache2 will ensure that Apache doesn’t start automatically on our system.
Project Directory Structure
Having installed the necessary tools, we can finally start working on our docker environment. Let’s create a new project, for me it’s going to be in ~/projects and I’m going to name it SymfonyWithDocker. For the database persistence, I created a directory path ~/projects/databases/SymfonyWithDocker.
In the root of the project we’re going to create a docker directory and then another two directories inside it, php and nginx. Also in the root, we’re going to create a docker-compose.yml file, which is going to define and control our docker services.
PHP container
Docker uses images to build containers and we can get these images from the official repository, Docker Hub. For some use cases the existing images will do the job out of the box, but for our PHP container we want to have some specific tools installed. Dockerfile is the tool that will help us achieve this.
In the docker/php directory we will need a file named dockerfile. Instead of building an image from scratch, we will use the official PHP image (check this page for more info) as a starting point:
FROM php:8.3-fpm
Project specifics
Next, we’re going to install the necessary php extensions and some utilities and tools, like Xdebug, Composer and Symfony CLI :
RUN apt-get update && apt-get install -y \
   git \
   unzip
RUN docker-php-ext-install pdo pdo_mysql mysqli
RUN pecl install xdebug-3.3.0 \
   && docker-php-ext-enable xdebug
RUN curl -sS https://getcomposer.org/installer | php -- --install-dir=/usr/local/bin --filename=composer
RUN curl -sS https://get.symfony.com/cli/installer | bash \
   && mv /root/.symfony5/bin/symfony /usr/local/bin/symfony
By default, docker commands are executed in the container by the container’s root user. This is useful when trying to install something in the container, but not so much when trying to create and edit files that should persist on the local machine because they will be readonly. We can try using the www-data user in the container, but the same issue will still occur. To circumvent this, www-data should be the default user and the www-data user and group in the container should have the same ids as our current user and group on the local machine. We can find our user by running id -u && id -g in the terminal. Having the ids we can now add into the dockerfile:
RUN usermod -u 1000 www-data && groupmod -g 1000 www-data
WORKDIR /var/www/symfony
RUN chown -R www-data:www-data /var/www
USER www-data
A few things are happening here :
- The id of the www-data user and group is set to be the same as on the local machine
- The entrypoint into the container is set to be the container’s root of the project. We can name this directory in any way, we’ll correlate it to our local project root (SymfonyWithDocker) in the docker-compose file.
- The ownership of the project’s root parent is set to www-data.
- The default user is set as www-data. This will allow us to run commands in the container as the www-data user without having to specifically request it everytime.
Since we installed git in the container, we’re also going to configure it in the dockerfile:
RUN git config --global user.email "your.email@whatever.com" \
   && git config --global user.name "Your Name"
That’s about it for our dockerfile, a minimalist php container ready for Symfony development. The full file will be accessible on git, link at the end of the article.
Depending on your requirements, this file can be modified or rewritten to serve a Magento app, to use different php versions or to serve applications written in entirely different programming languages.
Xdebug config
In the dockerfile we installed Xdebug, but we did not configure it. Let’s create a configuration file in the docker/php directory and name it xdebug.ini. We’ll load it into the container via the compose file.
xdebug.mode=debug
xdebug.client_host=172.20.0.1
xdebug.client_port=9003
xdebug.start_with_request=yes
zend_extension=xdebug
xdebug.log=var/log/xdebug.log
The client_host ip is the same as the IP we will declare as our gateway in the compose file. These settings will offer the possibility of using Xdebug with PhpStorm for all types of requests, from browser and command line to api requests, without needing additional tools and actions.
Nginx container
The official Nginx docker image already has everything we need, so there is no need to create a dockerfile for it. We will however need a configuration file with specifics for our project. In the docker/nginx directory, let’s create a default.conf file and add:
server {
   listen 80;
   server_name symfony.local;
   root /var/www/symfony/public;
   location / {
       try_files $uri /index.php$is_args$args;
   }
   location ~ ^/index\.php(/|$) {
       fastcgi_pass php:9000;
       fastcgi_split_path_info ^(.+\.php)(/.*)$;
       include fastcgi_params;
       fastcgi_param SCRIPT_FILENAME $document_root$fastcgi_script_name;
       fastcgi_param DOCUMENT_ROOT $document_root;
       internal;
   }
   location ~ \.php$ {
       return 404;
   }
   error_log /var/log/nginx/symfony_error.log;
   access_log /var/log/nginx/symfony_access.log;
}
Among other things, this configuration file establishes our server name as symfony.local and the root of our project in /var/www/symfony/public (this is the path in the php container). We’ll load it into the container via the compose file.
Docker compose file
As mentioned earlier, this file will define the containers and how they interact both with each other and with the local system. To start the file, it’s a good practice to add the version property even if it’s only informative. At the time of writing, 3.8 is the compose file version corresponding to the latest Docker engine release :
version: '3.8'
Php service
services:
 php:
   build:
     dockerfile: docker/php/dockerfile
   volumes:
     - ./:/var/www/symfony
     - ./docker/php/xdebug.ini:/usr/local/etc/php/conf.d/docker-php-ext-xdebug.ini
   environment:
     - PHP_IDE_CONFIG=serverName=symfony.local
   container_name: symfony_php
   networks:
     - symfony
- The dockerfile property under build defines the path to the dockerfile we just wrote
- The volumes property defines directories or files that should persist between the container and the local machine
- ./:/var/www/symfony – with this we are mounting the directory that contains our docker-compose.yml file to the /var/www/symfony directory in the container. This is the path we used in our Nginx configuration file.
- the next line mounts our xdebug configuration file to the appropriate path in the container
- The environment property allows us to add environment variables to our container. Alternatively, we can use the env_file property and provide the path to a .env file. However, in this case, it’s not worth it since we only have one variable.
- container_name is an optional property. If we don’t provide it, docker will concatenate the project directory, SymfonyWithDocker, with the service name, php. This is not great, as we will be using the container name quite a bit in commands, so it would be preferable to provide a unique name that is easier to use.
- The last property is networks, where we declared that this container should use the “symfony” network. This network is not yet defined, but we’ll get to it later on.
Nginx service:
nginx:
 image: nginx:latest
 ports:
   - "80:80"
 volumes:
   - ./:/var/www/symfony
   - ./docker/nginx/default.conf:/etc/nginx/conf.d/default.conf
 container_name: symfony_nginx
 networks:
   - symfony
 depends_on:
   - php
- instead of a build property with dockerfile, here we use the image property. This is the image name from the docker hub.
- ports exposes and maps the container ports
- depends_on expresses startup and shutdown dependencies between services.
MySQL service:
mysql:
 image: mysql:8
 ports:
   - "3306:3306"
 volumes:
   - ../databases/SymfonyWithDocker:/var/lib/mysql
 environment:
   MYSQL_ROOT_PASSWORD: root
   MYSQL_DATABASE: symfony
   MYSQL_USER: symfony
   MYSQL_PASSWORD: symfony
 container_name: symfony_mysql
 networks:
   - symfony
We’ve already gone over most of these properties in our previous services, the only new one is the environment property, which defines environment variables set in the container. In this case, we’re adding a db and setting credentials for it.
Redis service:
redis:
 image: redis:latest
 ports:
   - "6379:6379"
 container_name: symfony_redis
 networks:
   - symfony
We are done with the services that we decided to build for now, but we still need to define the “symfony” network that we declared in the services.
networks:
 symfony:
   driver: bridge
   ipam:
     config:
       - subnet: 172.20.0.0/16
         gateway: 172.20.0.1
Subnet provides a range of IPs that are available for our containers within the network. We could set a static IP for each container, but it’s not necessary at this time so we’ll let docker assign the IPs.
The gateway property allows us to specify a custom gateway (router) IP address for the network.
Testing the setup
We will use the gateway IP address to reach our app in the browser, but for it to work we also need to add this address to our hosts file, so in /etc/hosts we will add:
172.20.0.1 symfony.local
In the terminal, we are changing the directory to the root of our project cd ~/projects/SymfonyWithDocker and try to start it by running docker compose up -d. Docker will pull the images for our services from the docker hub, it will build our php image according to our specifications, set up a network, and then start everything. When running docker ps -a we should get something like this:

Success, our containers are up and running. The docker ps command lists all running containers and by adding the -a option, it will also show the stopped containers.
We now have a valid docker environment but there are a few more steps until we can say we have a properly configured Symfony app up and running.
How Do We Install the Symfony App?
We could install it on our host, but let’s play around with docker a little bit. We already installed the Symfony CLI tool in our PHP container, so this should be easy .. almost like it was planned.
There are two ways of running commands in a docker container, either by doing docker exec container_name whatever command or by entering the container via bash and the running commands as we would on our host. The latter might be a bit more interesting for this article, so in a terminal we’re going to go with docker exec -it symfony_php bash. Also, remember we set the www-data user as default for the php container. If we hadn’t done that, we would have to run the command with the -u option docker exec -it -u www-data symfony_php bash.
Now that we are logged in the php container as the www-data user, let’s proceed with the installation. The tool requires an empty directory in which to install the fresh app so we’re going to put it in a new folder and then move all the files to our root folder :
-
- symfony -V – check that Symfony CLI is installed
- symfony new –webapp new-app – Symfony CLI will create a new fully configured web project in the new-app directory
- mv new-app/{,.}* ./ – we move all the files and directories from new-app to our project root
- rm -rf compose.yaml compose.override.yaml new-app/ – we remove the now empty new-app directory and the docker compose files created automatically by the tool. These files contain instructions for a db container but we will use our own.
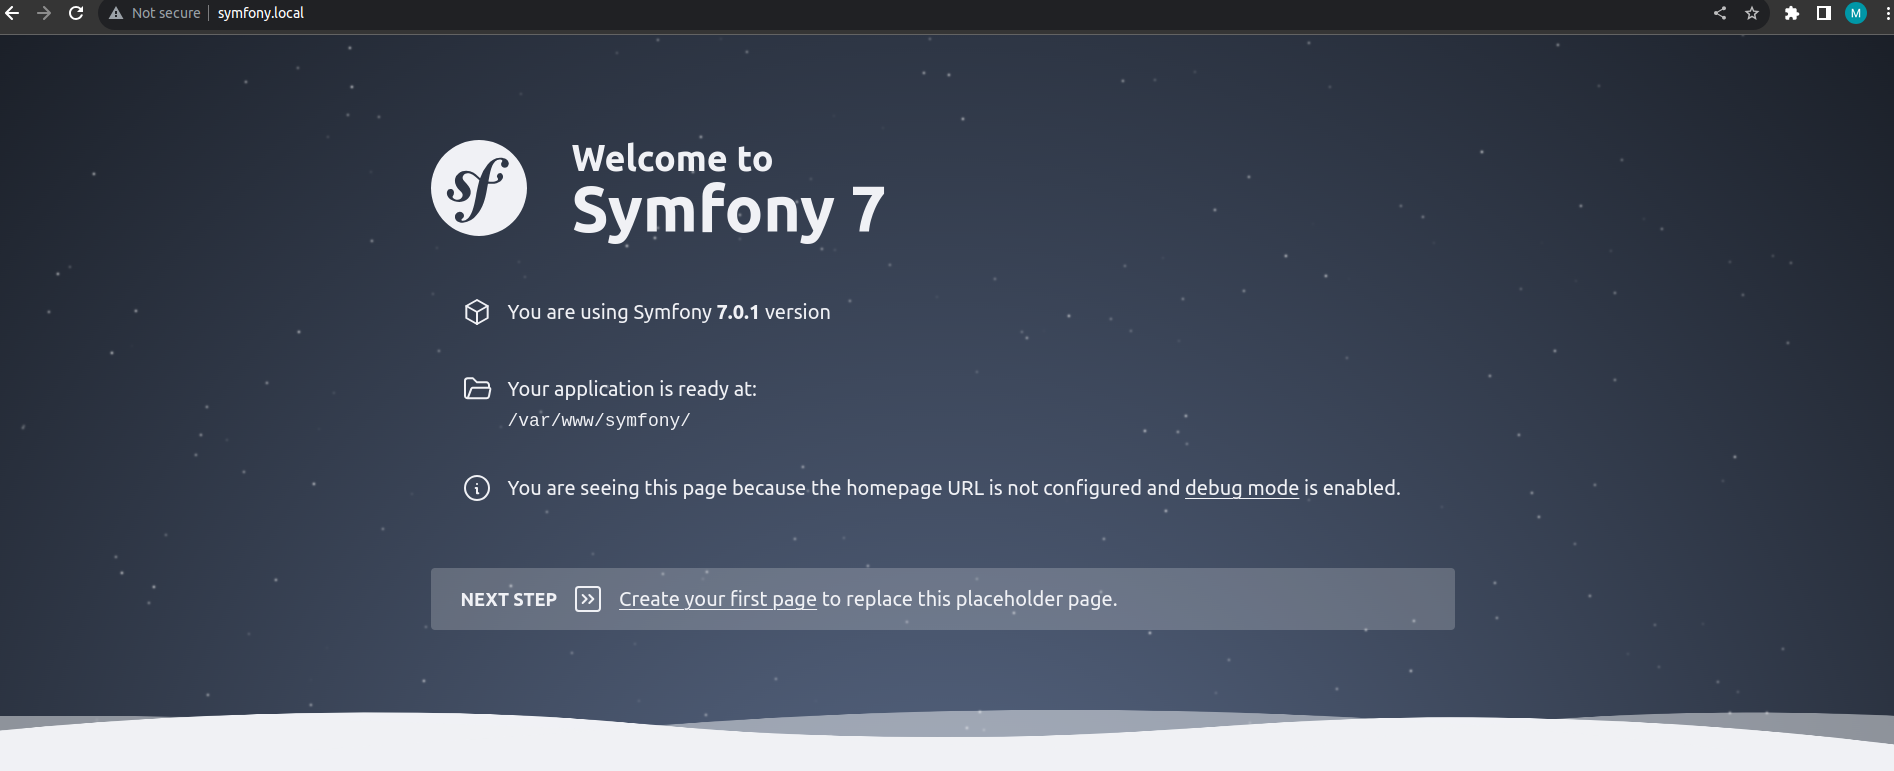
To test our app, we’ll open the browser and navigate to symfony.local to see the Symfony welcome page:
Configuring and testing the db
So far, so good. Next, we’ll configure the app to use our docker database and to do this we’ll use PhpStorm as a code editor. Open the project in your desired IDE and edit the .env file in the project root so that the DATABASE_URL points to our db :
DATABASE_URL="mysql://symfony:symfony@mysql:3306/symfony?serverVersion=8.2"
We can test the db connection by trying to create the database if it doesn’t exist. Run in the php container terminal bin/console doctrine:database:create –if-not-exists. The response should be “Database `symfony` for connection named default already exists. Skipped.”, which means our connection is good to go.
Configuring and testing Redis
For our Redis connection there are a few more steps to do. In .env we should add the url to Redis as REDIS_URL=”redis://symfony_redis:6379“, where symfony_redis is the name of our docker service, followed by the exposed port. Then in config/packages/cache.yaml we’re going to go to the Redis section and uncomment the app and default_redis_provider lines and set them to:
app: cache.adapter.redis

default_redis_provider: '%env(REDIS_URL)%'
Symfony does not have an out-of-the-box way of testing the Redis connection, so we’re going to write a quick command for this purpose, but before that, we’ll also need a Redis client. First, let’s install the Symfony package by running in the root of our project, in the docker php container composer require predis/predis. Now let’s create a PHP class with the src/Command/TestRedisCommand.php path and write our test command:
<?php
declare(strict_types=1);
namespace App\Command;
use Symfony\Component\Console\Attribute\AsCommand;
use Symfony\Component\Console\Command\Command;
use Symfony\Component\Console\Input\InputInterface;
use Symfony\Component\Console\Output\OutputInterface;
use Symfony\Contracts\Cache\CacheInterface;
#[AsCommand(name: 'app:test-redis')]
final class TestRedisCommand extends Command
{
   public function __construct(private readonly CacheInterface $cache)
   {
       parent::__construct();
   }
   protected function execute(InputInterface $input, OutputInterface $output): int
   {
       // Fetch from cache or set if not exists
       $cacheItem = $this->cache->getItem('test_key');
       if (!$cacheItem->isHit()) {
           $cacheItem->set('Hello Redis!');
           $this->cache->save($cacheItem);
       }
       $output->writeln('Value from Redis: ' . $cacheItem->get());
       return Command::SUCCESS;
   }
}
When running bin/console app:test-redis in our PHP container, we will get the “Value from Redis: Hello Redis!” response, letting us know everything is working. If we want to see the key in our Redis container, we can get into the container with docker exec -it symfony_redis bash and enter redis with the redis-cli command. Symfony adds prefixes to cache keys in Redis (and other caching systems) as a best practice to avoid key collisions and to manage cache entries more effectively, so first we’ll have to identify our cache key by running KEYS *. We can then do GET [key_name] and we’ll see our “Hello Redis!” value.
What Are the Recommended PhpStorm Settings?
Xdebug
Xdebug is already installed and configured in our PHP container, we just need a few finishing touches for the IDE. In PhpStorm go to Main Menu > File > Settings > PHP > Servers and add a new server with:
- name: symfony.local, same as our nginx server name and compose PHP_IDE_CONFIG serverName
- host: 172.20.0.1, same as our gateway ip
- port: 80
- debugger: xdebug
- use path mappings: yes
- absolute path on the server: /var/www/symfony, the path in the container
Now to test it. We’re going to Main Menu > Run > Break at first line in PHP scripts, then click on Start listening for PHP debug connections in the top right of PhpStorm (or in the same menu as before). If we refresh our browser page, Xdebug hits a breakpoint in public/index.php and if we run bin/console in the container terminal, Xdebug hits a breakpoint in bin/console.
Database
Open PhpStorm and go to the Database tool window. If it’s not visible, enable it by going to View > Tool Windows > Database. Click the + icon, go to Data source and select MySQL:
Host: localhost
Port: 3306
User: symfony
Password: symfony
Database: symfony
Click “Test Connection” to ensure PhpStorm can connect to the database in the Docker container. If successful, you’ll see a message indicating the connection is successful.
Harnessing the Power of Docker
As we draw this article to a close, I hope that it has served as a valuable guide in unraveling some of the intricacies of Docker. I encourage you to use this knowledge as a springboard to explore further, experiment with different configurations and tailor Docker environments to your specific project needs. The world of Docker is vast and constantly evolving and there’s always more to learn and discover.
As promised, the files created in this article are available here if you’re looking just for the docker environment or here if you’re looking for the environment with Symfony installed.
Interested in more insights? Check out our recommended read: 5 Software Development Blogs You Should Check for further exploration into the world of software development.